
Overview
- For a printer to understand a STL file, it needs to be prepared using a "Slicer" - software, which converts the geometry into a long series of coordinates, which the printer can understand.
- Formlabs provides their own, open-source software called PreFrom.
- Download from: http://formlabs.com/products/preform/
- In the following, we will introduce the features that we use and find useful.
Introduction

- PreForm can import models in .stl and .obj file formats.
- Launch PreForm and setup your printer.
- Select the model of your Printer.
- Specify your Material, the type and the version of the resin. (There is an active link in blue at the bottom that can help you identify your resin type.)
- Select Layer Thickness (in mm) with the slider. The default value is 0.05 mm, but you can adjust it to 0.1 mm for a faster print or 0.025 mm for a print with the highest resolution.
- Click Apply to save the settings and proceed to the next level to modify your model.
- Click Print Settings on the bottom bar in the main workspace (see image below) to the change the above settings.
View Menu
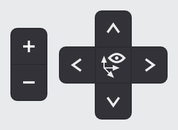
- The View Menu is located on the right top corner of the screen.
- Zoom in/out using the +/- buttons or the scroll wheel of the mouse.
- Rotate the view 90 degrees to the top, left, right and bottom using the arrows.
- Click the centre icon to return back to the initial view.
- Alternatively: Rotate the view around the model with Right click + drag and Right click + Shift to pan.
Size Menu
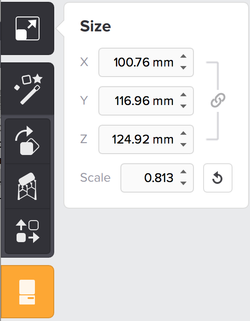
- Before you start processing, click the model to enable it. It will become blue.
- Click the Size icon to resize your model.
- You can specify each dimension (X,Y,Z) seperately or change the Scale factor to
resize your model by a certain factor. - Be careful with the units! PreForm assumes they are always in millimeters.
To change them in inches: Edit -> Model units -> in - Alternatively: Click anywhere on your screen and drag to resize the model directly.
One Click Print Option

- Select One-Click Print option and PreForm will complete automatically all the following steps, Orientation, Supports, and Layout.
- Then, you have to confirm and send the job to your FormLabs printer from the Print popup window. Check you specified the correct printer and type of resin.
- Quite useful if you are not very familiar with 3D printing.
Orientation Menu
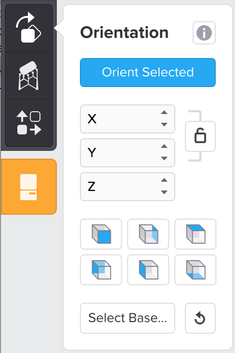
- Click the Orientation icon to rotate your model.
- PreForm will compute the optimum orientation for a successful print automatically.
- Rotate your model in a specific angle in each X,Y,Z axis.
- Use the shaded cube icons to flip your model along each axis.
- Click the Select Base icon to place a face pointing toward the build platform.
- Alternatively: Click anywhere on your screen and drag to rotate the model directly.
- It is recommended to allow the PreForm software to compute the model's orientation.
Supports Menu

- Click the Supports icon to generate supports for your model.
- Supports are essential to ensure a successful printing and can become quite valuable in models with complex geometries.
- Support structures consist of the following parts: Base, Scaffolding and Tip.
- Click Generate All and PreForm will generate supports automatically.
- Use the Edit All icon to add and remove supports after auto-generating.
This can be become quite important for complex models. - Density: defines how closely placed is the support scaffolding and the number of touch-points on your part.
- Touch-point size: supports connect to the part at the touch-point. Larger touch-points make stronger supports but they are more difficult to be removed after the printing.
- Internal supports: You can control whether you prefer automatically generated internal supports or not.
- Flat spacing: changes the density of supports, being similar to adjusting the density slider.
- Slope multiplier: sets the steepest slope value at which the software will start adding support structures to your model. Its value should be increased to add more supports to sloped surfaces.
- Base thickness: crucial factor since the base adheres to the building platform and the support structures with the actual model itself are built on top of this.
- Height above the base: sets the minimum height of support structures. It can be lowered to reduce the resin usage but it can’t go lower than 2 mm. If it’s too low it may cause support deformation of failure. PreForm recommends a default height value of 5 mm.
Layouts Menu
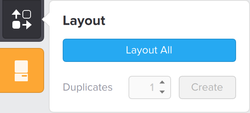
- Click the Layout icon to move your model to different locations on the build platform.
- Your view will be reoriented as you look down on the build platform from above.
- Use the duplicates option to make one or more copies of your model.
Final model checking before printing
- Before printing use the Slicer in the right part of the screen for a last check on your model.
- Check for Overlapping Models, Internal supports, unsupported parts and correct shelling (where it is applicable).
Information from FormLabs Set up your print.